Wordpress.org
What is it all about?
In today's world of web hosting, these companies are offering their customers with a "one-click install." After installing Wordpress.org onto our server, we will take a peek inside!
- Dashboard
- Posts
- Media
- Pages
- Appearance
- Themes
- Widget
- Menu
- Editor (Do Not Touch)
- Plug ins
- Users
- Settings
- General
- Reading
Steps
- Adding a theme- Uploading onto the server, inside our themes folder.
- Go to Appearance, then themes
- On the themes page, locate your newly uploaded theme and activate
- View Source
- Find <header id="masthead" class="site-header" role="banner">
<div class="site-branding"> - Upload logo via Media on Dashboard
- Copy and paste the absolute link
- Open the header.php, below the div class branding, add your image
- Upload your header.php file
- On the dashboard, go to Plug ins, ADD
- Search "Soliloquy"
- Research plug ins
- Install Soliloquy Lite
- Activate Soliloquy Lite
- Add images
- View shortcode [soliloquy id="9"]
- How to add your shortcode in Wordpress
- But Wait... where do we place the Soliloquy Slider....???
- Whew!
Now it's time for our index.php.
The index.php is our "home page." We need to tell wordpress that this our our front page (home page). We do that with a comment tag:
/*
Template Name: Front Page
*/

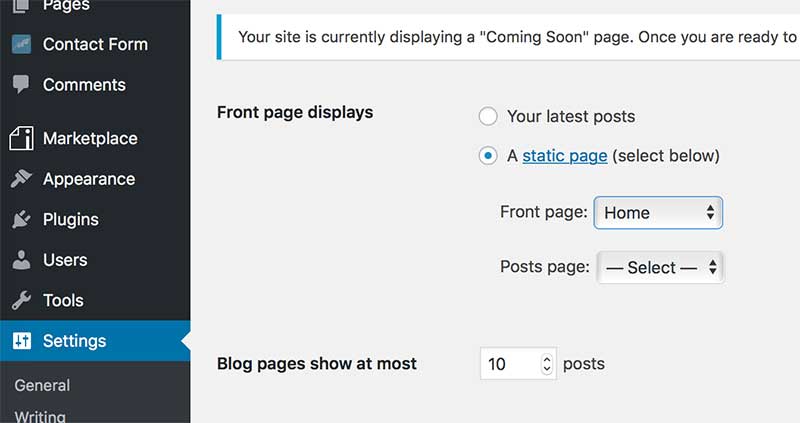
and... by going to the DASHBOARD and...by going to Settings, then Reading.

You will need the images for the flex-slider and logo!


More Steps
- In the Dashboard, go to the Pages tab, the All Pages
- Let's edit our home page!
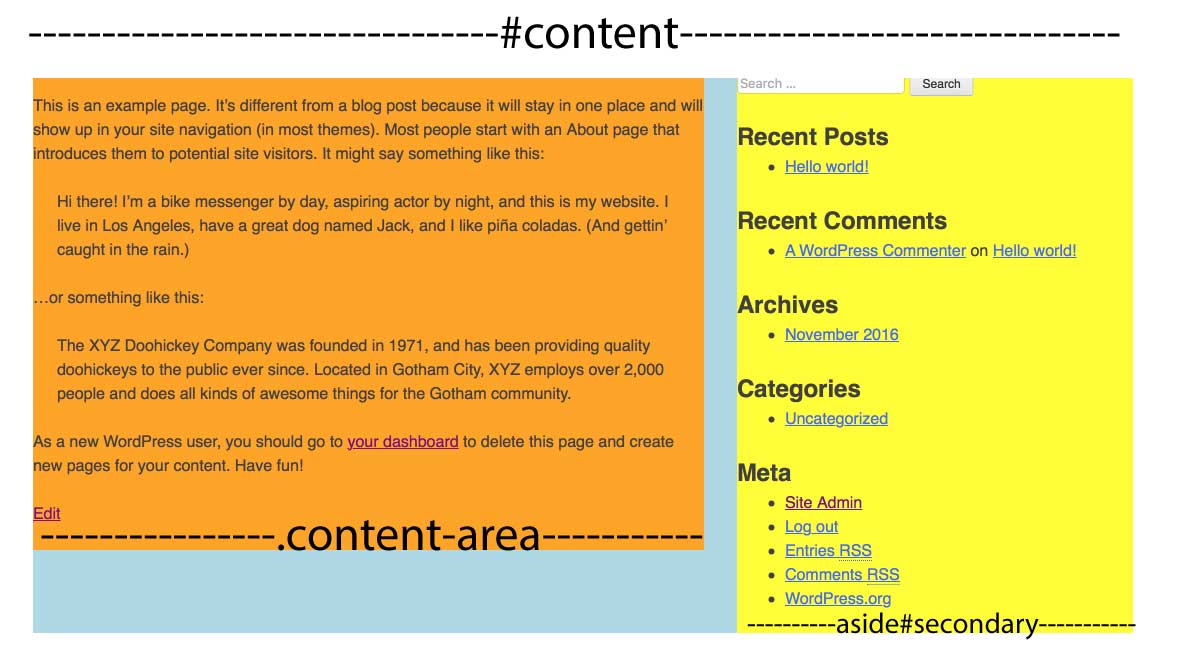
- View Source...and you will find certain names for containers - here they are!

Where are your widgets?
Working files
- index.php
- page.php
- header.php
- footer.php
- sidebar.php
- functions.php
